Steps
NDAX – making iT easy for us
Overview
We previously posted a guide to acquiring ADA, and at the time it was one of the best/easiest paths to do so. However, now we have NDAX, an exchange that allows Canadians to buy ADA directly. This is a one-stop-shop option that streamlines the process of acquiring ADA.
While this is the best way for Canadians to buy ADA, it is also a great option for anyone outside of Canada.
TIP: if it’s your first time purchasing cryptocurrencies, start with a small amount to become familiar with each step. Then you can increase the size of your transactions. This is worth reiterating.
If you have any questions before, during or after reading this guide, please reach out to us directly and we’d be happy to help you out: info@cardanocanucks.com, Telegram, Twitter , Facebook .
Broadly, the overall process consists of setting up your wallet (where you want your ADA to end up), then converting your everyday currency and sending it to your wallet. Normally, the process starts with changing your local currency to Bitcoin, then converting that to ADA. This is where NDAX can save a lot of time and complexity. For the purposes of this guide, we’re going to use the Canadian dollar as the local currency. Here is an overview of the process:

For this guide, we’ll be using Daedalus for the Cardano wallet and NDAX for the purchase of ADA. Please keep in mind that all of these tools are constantly improving, so if you find that anything here is out of date, let us know and we’ll make updates or point you in the right direction.
Let’s get started!
Step 1: Download anD Set Up your Wallet
We’ll be using the Daedalus wallet for this guide. It’s the original full node wallet developed by IOHK. There are alternatives, like Yoroi, which are just as good. However, they are developed by different companies, so their features and development timelines might be slightly different. The Daedalus Wallet can be downloaded here:

Once you have downloaded Daedalus, follow the instructions to create a new wallet. The name of the wallet doesn’t matter. One of the steps is to write down your secret passphrase. DO NOT store this information digitally by taking a screenshot or creating a text file. Actually write it down, and store it in a safe place. Anyone who knows this passphrase will have access to your wallet and any funds within.
STEP 2: Create an Ndax Account
Go to NDAX.io and create an account. If you use our affiliate link, you will receive a nice little reward ($10). If you prefer not to use the affiliate link, simply navigate to https://ndax.io.
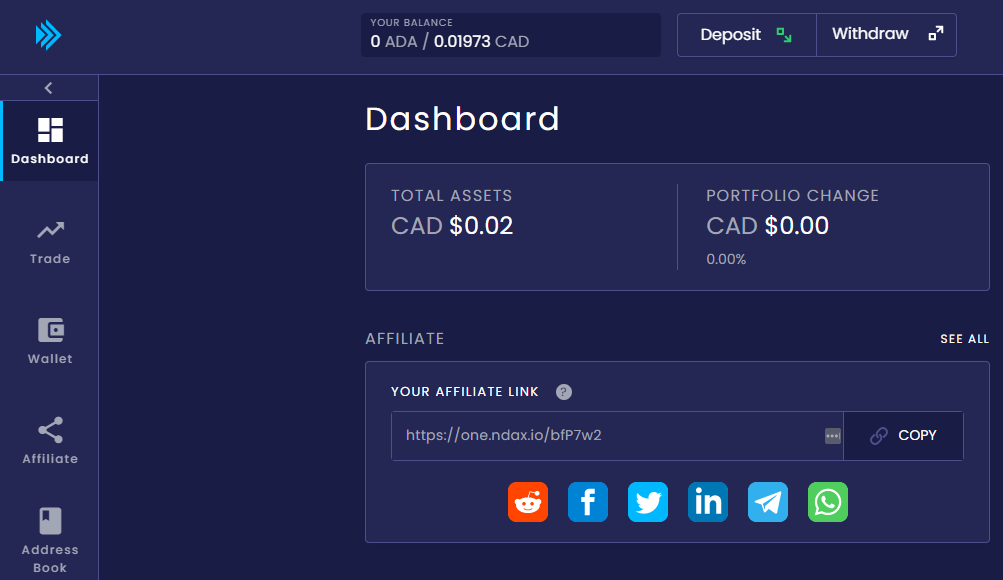
There are several exchanges out there, but only one in Canada that allows you to buy ADA directly with Canadian dollars. Like every other exchange, you’ll be asked to provide your KYC (Know Your Customer) documentation for approval. Thankfully, this process is quite quick. Once complete, you’ll see your dashboard which looks like the following:
STEP 3: FUND YOUR NDAX ACCOUNT
Now that we have your wallet and exchange account, it’s time to start moving your money through. We recommend you enable 2FA (two-factor authentication). It’s a good practice and a standard for protecting your money. At the top of your dashboard, you will see a button to Deposit funds.
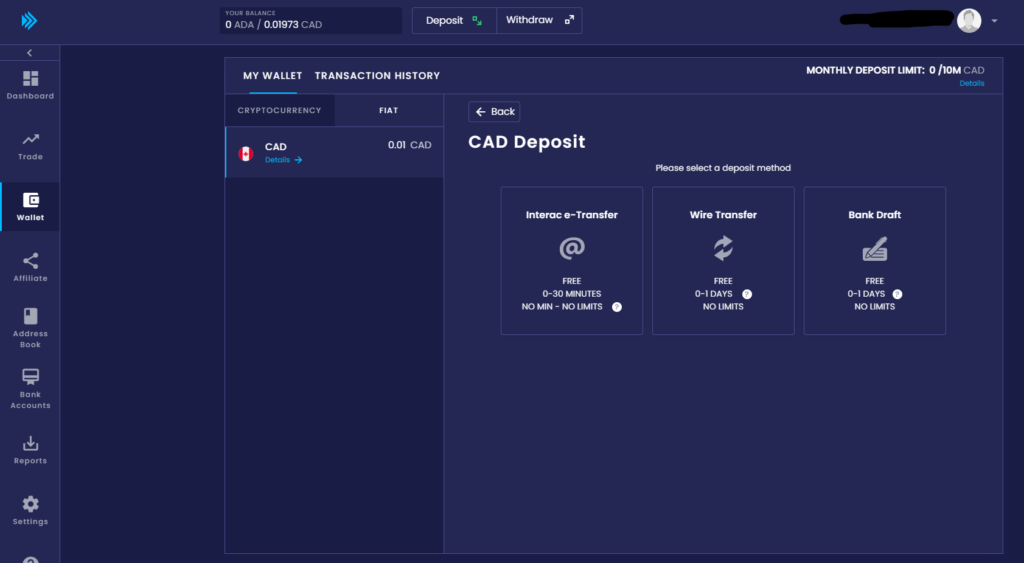
You will see an option to add funds using Interac e-Transfer. When you select Interac e-Transfer, you will see a prompt to enter your name and the amount you want to transfer. NOTE: the time frame mentions 0 – 30min. I’ve done this several times and the first time it took almost 30min. The second time it was almost instantaneous. Don’t worry if things don’t happen instantly.
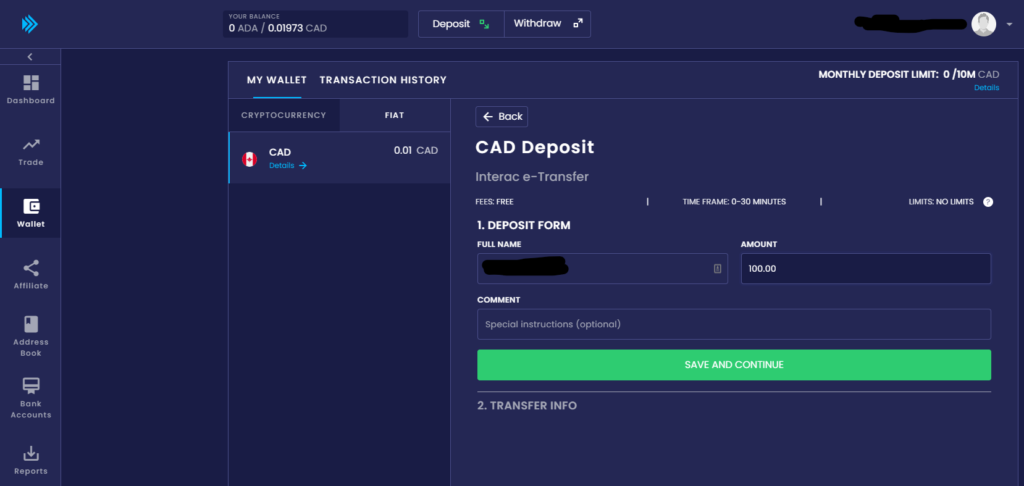
The next step will display a confirmation of receiving your funds. In this case, I transferred $100 CAD into my account and it shows under my total assets in the dashboard.

STEP 4: Acquire ADA
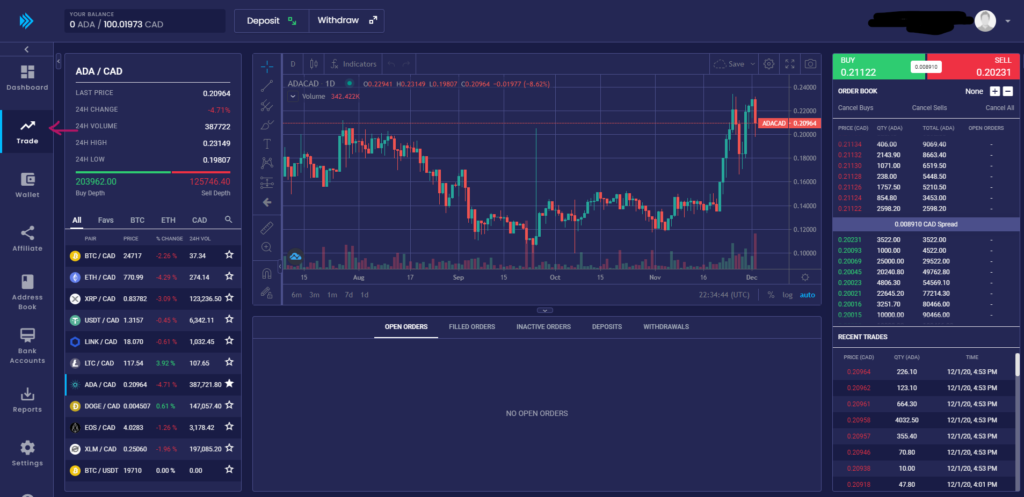
The next step is to buy ADA directly with your Canadian Dollars within NDAX. This is one of the advantages of going with an exchange like NDAX — they’ve worked hard to provide us a way of acquiring ADA directly with CAD. Select the Trade icon on the left menu, then select the ADA/CAD trading pair from the list. Once you see the screen below, click on the big green BUY box that displays the current price of ADA.
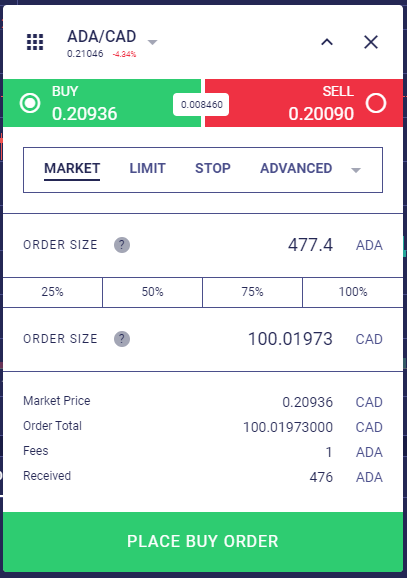
You will then get a screen overlay to place your buy order. This screen gives you a lot of great options to optimize how you buy ADA. For the purposes of this guide, we’ll keep things simple. Assuming you intend to buy as much ADA as you can with your CAD funds, click on the 100% in the middle (right) of the screen. It will automatically populate the order size fields for you and show you the associated fees. Place your buy order with the big green button at the bottom. Keep an eye out for confirmation emails throughout this process. If you feel like something is taking too long, there might be a confirmation email that you need to accept.
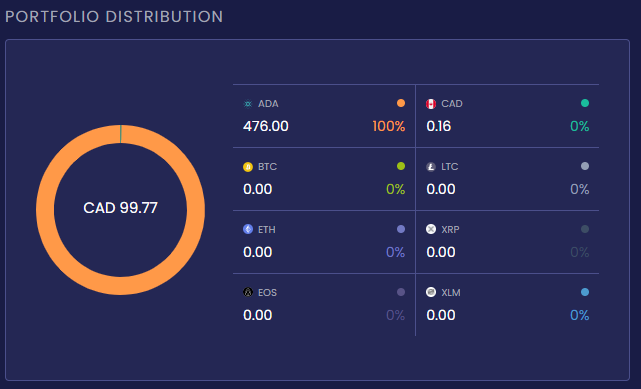
Congratulations! You now own ADA. I won’t go into the particulars of how this process works, but because you’re placing a buy order that needs to be filled by someone selling, it may take time and may be broken into multiple transactions on the exchange. Once your buy order is complete, you’ll see your funds in your dashboard.
STEP 5: SEND YOUR ADA TO YOUR WALLET
The last step is to move your ADA to your wallet so you can delegate and start receiving rewards. At the time of writing, you can send your ADA to Daedalus, Yoroi, or your hardware wallets and delegate from any of them. For this guide, we’ll stick with sending it to your Daedalus wallet, but if you’re interested, please reach out and we’d be happy to discuss other ways to delegate.
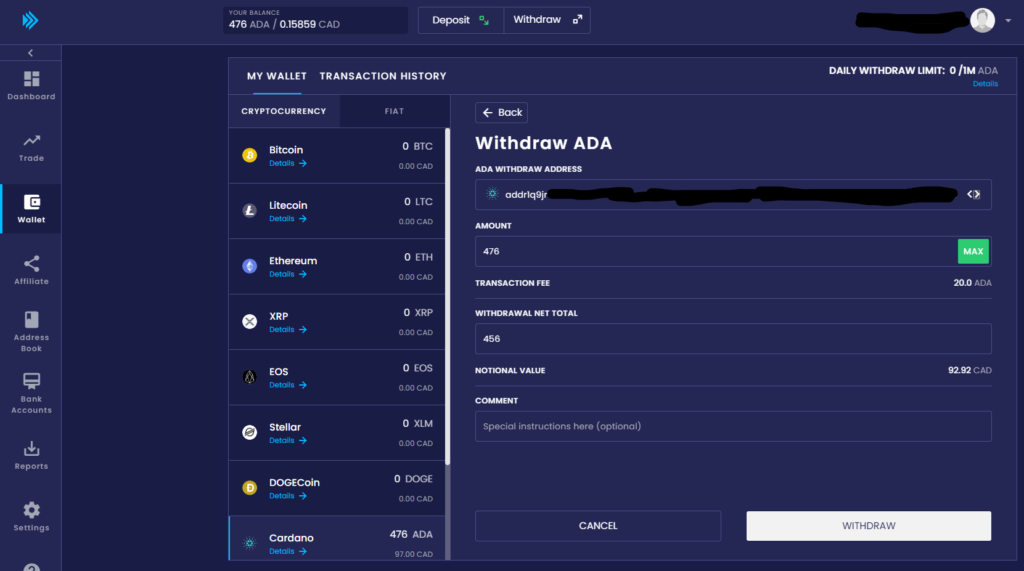
NDAX makes withdrawing any currency easy with a Withdraw button at the top. Another way to get there, is to select Wallet in the menu to the left, select the currency you want to withdraw, then select Withdraw. You should see a screen like the one below with empty fields. For now, hit the MAX button to select all of the ADA you currently have on NDAX.
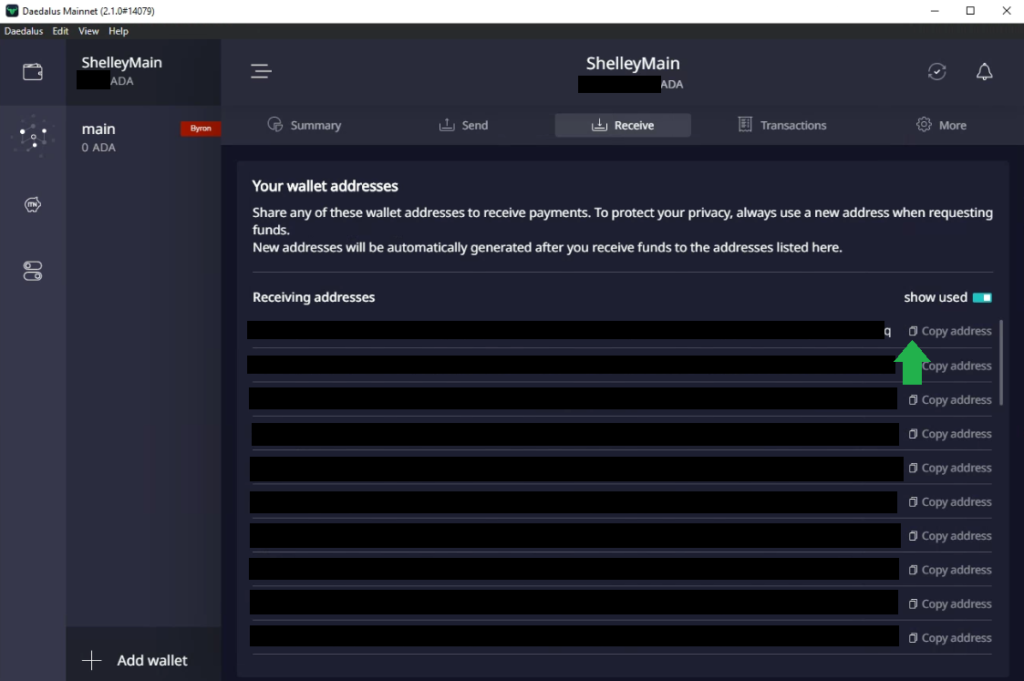
Now you need the “ADA Withdraw Address”. This is where the ADA will end up — like your ADA inbox. We’ll need to open up Daedalus for that. Select the wallet you created in STEP 1 and click on the “Receive” tab.

You will see a list of addresses that you can use to receive funds in this wallet. Copy an address (doesn’t matter which one), in our example it’ll end in a “q”. Now, paste that address into the “ADA Withdraw Address” box in NDAX and hit “Withdraw”
Go through the confirmation steps, including the confirmation email you will receive. Once that is complete, you will see your ADA appear in your Daedalus wallet.

Now that you have ADA in your wallet, delegate it to CANUK (or whichever stake pool you like ).
This guide replaces the older guide where we used Shakepay and ChangeNow. While these are still great services, they require several more steps than using NDAX. If you would still like to see the older guide, you can find it here.
Like this guide? Drop us a message or sign up for our newsletter to be notified of more content as it becomes available!