Steps

Let’s Do This!
Overview
So you’ve done your research and you’re ready to join the Cardano community by acquiring your first few ADA, but where do you start?
UPDATE: We have created a new guide with fewer steps using NDAX here.
The process of buying cryptocurrencies can be daunting for newcomers, particularly for currencies like ADA which are not traded on Canadian exchanges (yet). If you are new to buying cryptocurrencies, and are confused by the many options out there, then this guide is for you.
We have documented below one method for acquiring ADA which we have used many times. We like this method because it minimizes the amount of time you have to have your money on an exchange. It is our belief that your money should sit on an exchange for no longer than necessary.
We geared this guide on how to acquire ADA toward the Canadian Audience, but it can be used by anyone anywhere. The process will be similar, however the sites/tools/applications may be slightly different.
TIP: if it’s your first time purchasing cryptocurrencies, start with a small amount to become familiar with each step. Then you can increase the size of your transactions.
If you have any questions before, during or after reading this guide, please reach out to us directly and we’d be happy to help you out: info@cardanocanucks.com, Telegram, Twitter , Facebook .
Broadly, the overall process consists of setting up your wallet (where you want your ADA to end up), then converting your everyday currency and sending it to your wallet. Currently, Bitcoin is the most-traded and widely known cryptocurrency. As such, almost all cryptocurrency transactions will start with changing your local currency to Bitcoin. For the purposes of this guide, we’re going to use the Canadian dollar as the local currency. Here is an overview of the process:

For this guide, we’ll be using Daedalus for the Cardano wallet, Shakepay for the exchange and ChangeNOW for the conversion from Bitcoin to ADA.
Let’s get started!
Step 1: Download anD Set Up your Wallet
We’ll be using the Daedalus wallet for this guide. It’s the original full node wallet developed by IOHK. There are alternatives, like Yoroi, which are just as good. However, they are developed by different companies, so their features and development timelines might be slightly different. The Daedalus Wallet can be downloaded here:

Once you have downloaded Daedalus, follow the instructions to create a new wallet. The name of the wallet doesn’t matter. One of the steps is to write down your secret passphrase. DO NOT store this information digitally by taking a screenshot or creating a text file. Actually write it down, and store it in a safe place. Anyone who knows this passphrase will have access to your wallet and any funds within.
STEP 2: DOWNLOAD THE SHAKEPAY APP
There are several exchanges out there that allow you to convert your Canadian Dollars to Bitcoin. Some examples are Coinsquare.com and Coinbase.com. The process is slightly different for each exchange, so pay attention to fees and look out for confirmation emails. We’ll be using Shakepay in this guide. You can click on the image below to go to the website and create an account. The app will be required to actually send your Bitcoin to ChangeNOW when it’s time.

STEP 3: FUND YOUR SHAKEPAY ACCOUNT
Now that we have all the accounts and tools that we need, it’s time to start moving your money through. We recommend you enable 2FA (two-factor authentication). It’s a good practice and a standard for protecting your money. Log into Shakepay and select “Add Funds” on the menu to the left.

You will see an option to add funds using Interac e-Transfer. There is a limit to the amount that you can transfer, which can be increased by providing KYC (Know your customer) information like photo ID etc. For now, we’ll skip the KYC step, and proceed with funding the account. When you select Interac e-Transfer, you will see information that you can use to e-Transfer from any major bank.

This process is pretty straightforward and quite quick. Once you’ve transferred your money, go back to “Wallets” in Shakepay to verify your balance in Canadian Dollars.
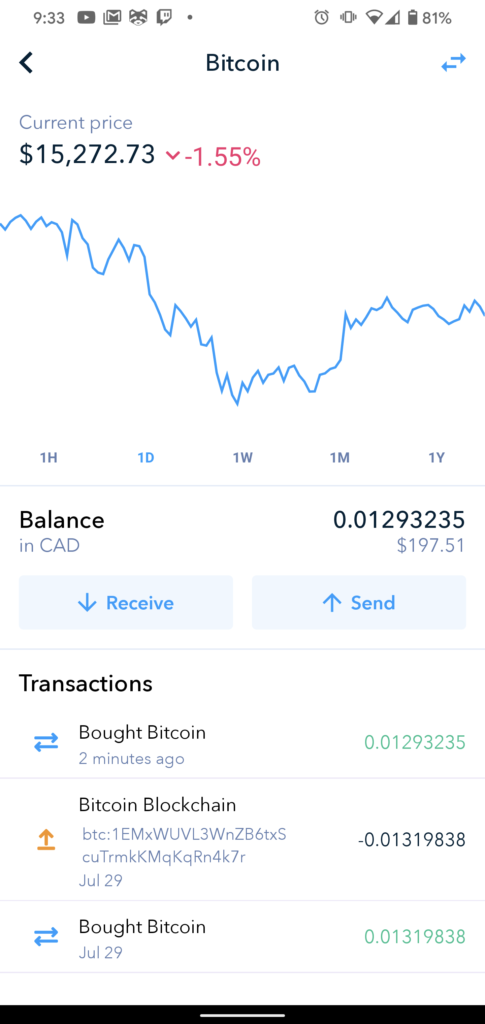
STEP 4: Acquire Bitcoin
The next step is to buy Bitcoin with your Canadian Dollars within Shakepay. Select “Buy & Sell” on the menu to the left. You can enter the amount that you want to convert, or just select “Max” and it’ll convert all the funds you have available in CAD to Bitcoin. Note that the price/rate in the screenshot below is based on the rate at the time this guide was written. It will likely be different when you do this, and will result in a different amount of Bitcoin (BTC). Hit “Continue”, then review the transaction and select “Confirm”. Congratulations, you now own some Bitcoin.

STEP 5: CONVERT YOUR BITCOIN TO ADA
This last step is to convert you Bitcoin to ADA and we’ll do this using a service called ChangeNOW. We like ChangeNOW because it allows you to exchange digital currencies directly into your wallet rather than have your currencies sit on an exchange. Go to Changenow.io and select the pair that we want to convert: BTC to ADA as shown in the screenshot below. Also, fire up the Shakepay app, you’re going to need it now.
NOTE: Be sure to determine if your exchange takes any fees for transactions. If they do, you’ll need to account for them when determining how much Bitcoin you are sending to ChangeNOW.
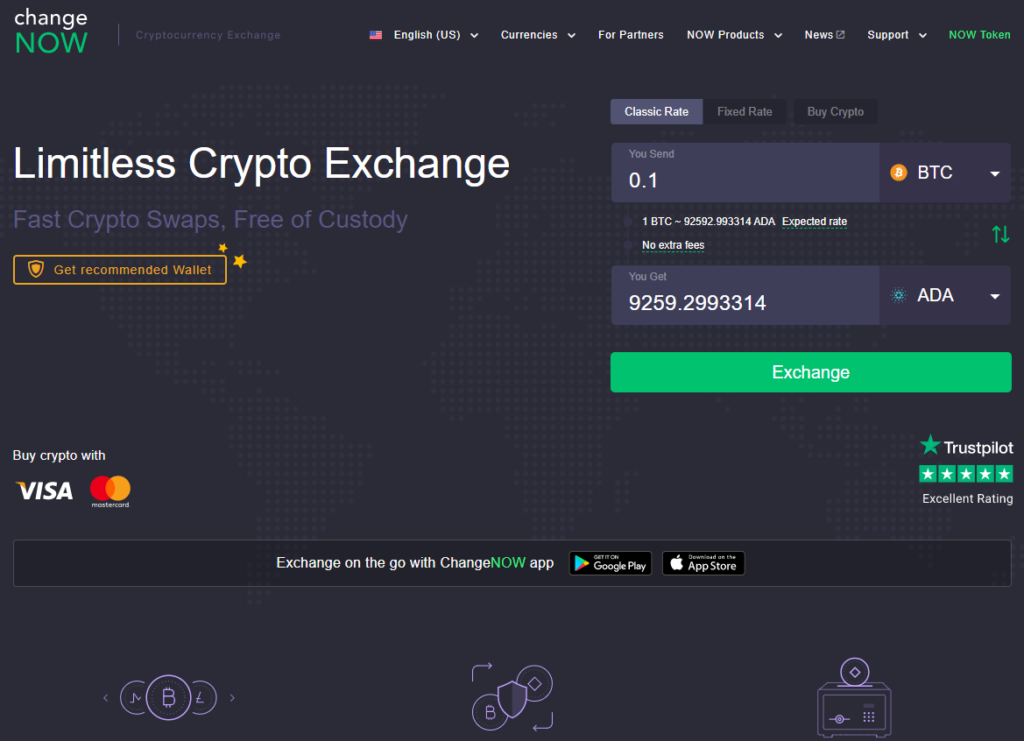
Open the Shakepay App and enter the amount of Bitcoin you want to convert (0.01293235 in the example below) into the ChangeNOW BTC box (where it says 0.1 above)
Select “Exchange” in ChangeNOW,
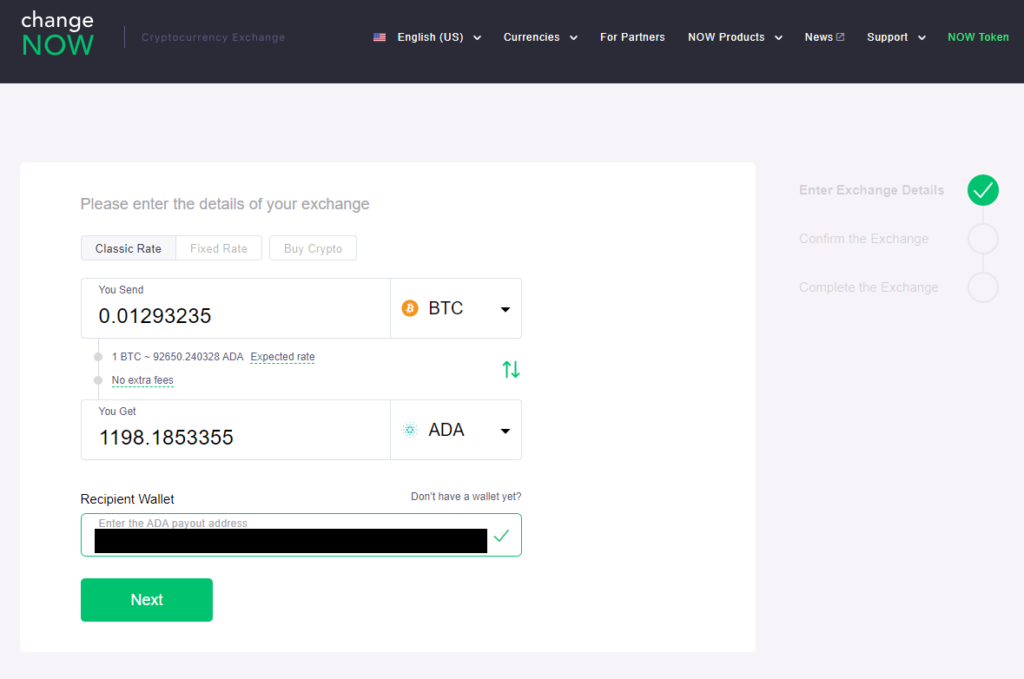
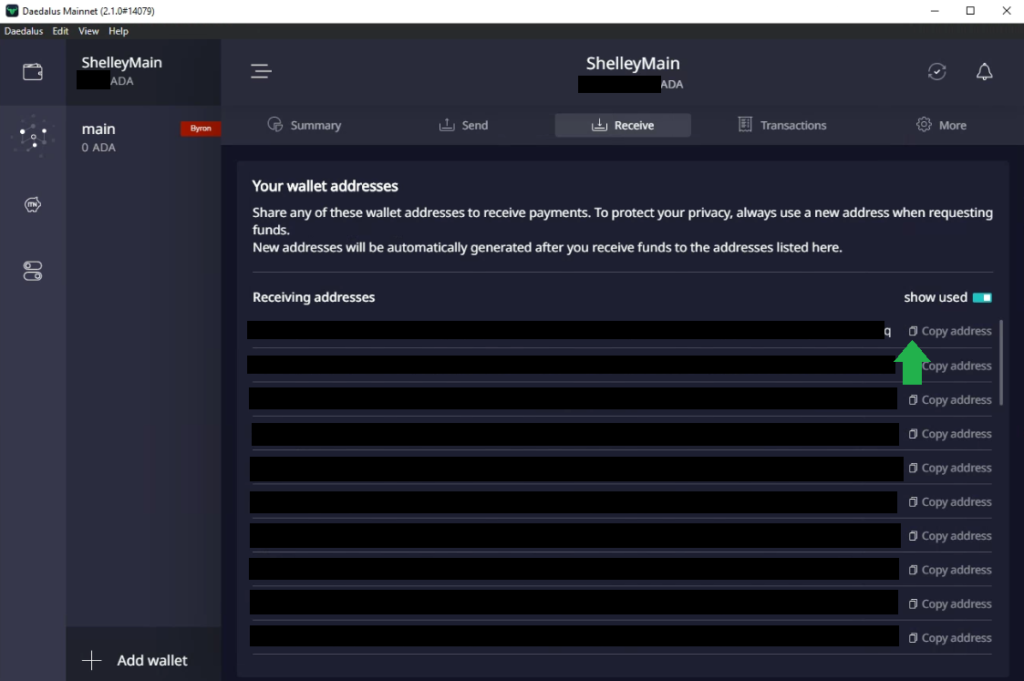
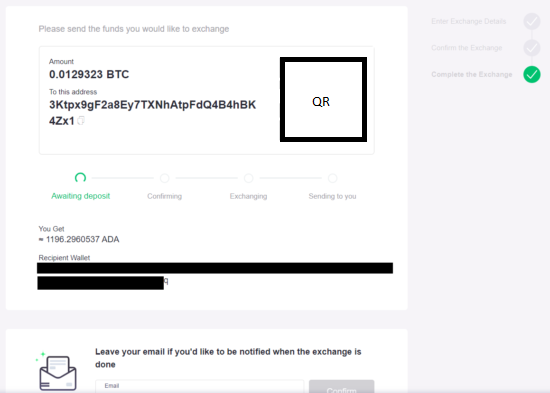
ChangeNOW will ask for the “Recipient Wallet”. This is where the ADA will end up — like your ADA inbox. We’ll need to open up Daedalus for that. Select the wallet you created in STEP 1 and click on the “Receive” tab.

You will see a list of addresses that you can use to receive funds in this wallet. Copy an address (doesn’t matter which one), in our example it’ll end in a “q”. Now, paste that address into the “Recipient Wallet” box in ChangeNow and hit “Next”
You will now see a confirmation page that will tell you how much ADA you should expect to be deposited in that wallet address you just provided. Hit “Confirm” and do the checkbox thing. I’ll leave the decision to read through the Terms of Use and Privacy Policy up to you 😉 but you need to check the box.

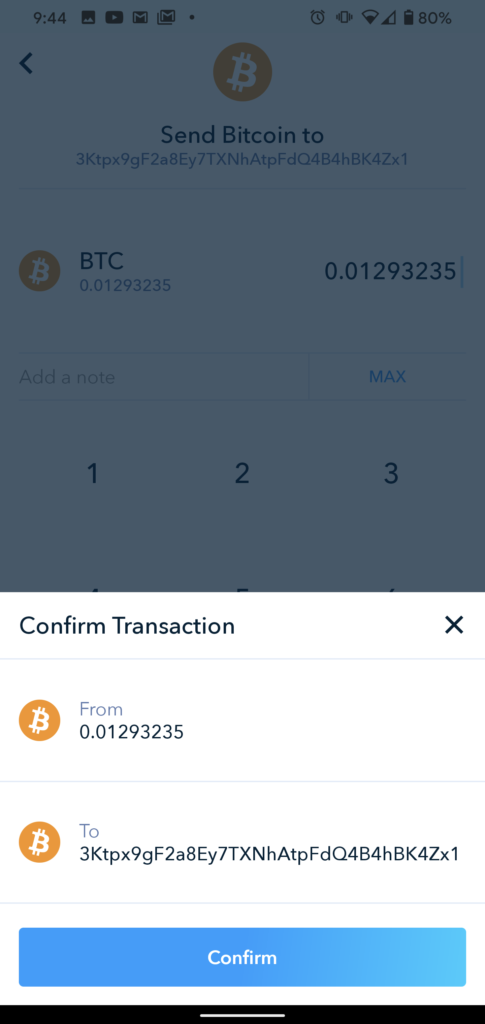
Next, ChangeNow will ask you to deposit the Bitcoin in the amount you provided earlier. For other exchanges, you’ll copy the address provided (ends in 4Zx1 in this example), and put that in the “sending address” in your exchange of choice. In our example, we’ll open up the Shakepay app and send funds by using the QR code (so convenient!)
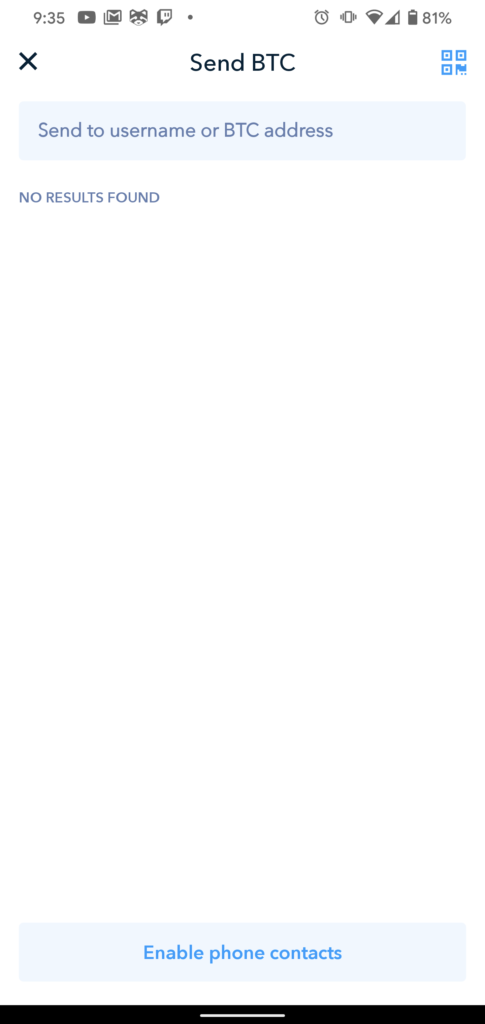
As mentioned, open up the Shakepay App, select BTC (Bitcoin), hit “Send”, then hit that little icon (looks like a mini QR code), and you’ll be able to get the QR code from ChangeNOW using your phone’s camera. Double check the amount of BTC you are sending and hit “confirm”.
Now, all that’s left to do is wait. This will take a few minutes, so go top up that coffee.

Once complete, you will receive confirmation from ChangeNOW and see your ADA in your wallet. You will need to let Daedalus fully sync before you see your transaction appear. Congratulations, you are now a proud member of the Cardano Community!


Like this guide? Drop us a message or sign up for our newsletter to be notified of more content as it becomes available!